Step-By-Step Guided Instruction: Get Started Quickly to Unleash the Full Power of the Platform’s Capabilities
We are thrilled to announce the release of an onboarding wizard designed to simplify the onboarding experience for the SOC Prime Platform. The newly released functionality is designed to assist SOC Prime users with driving immediate value:
- Enable the guided onboarding workflow with just a couple of steps.
- Understand the benefits of using the core platform capabilities, like Environments integration, Hunt modules, Custom Field Mapping, Search Profiles — all of which are intended to streamline threat detection and threat hunting.
- Customize the desired functionality to make the platform experience tailored to the user’s security needs.
- Provides video content and multiple options for help and support across the entire onboarding process.
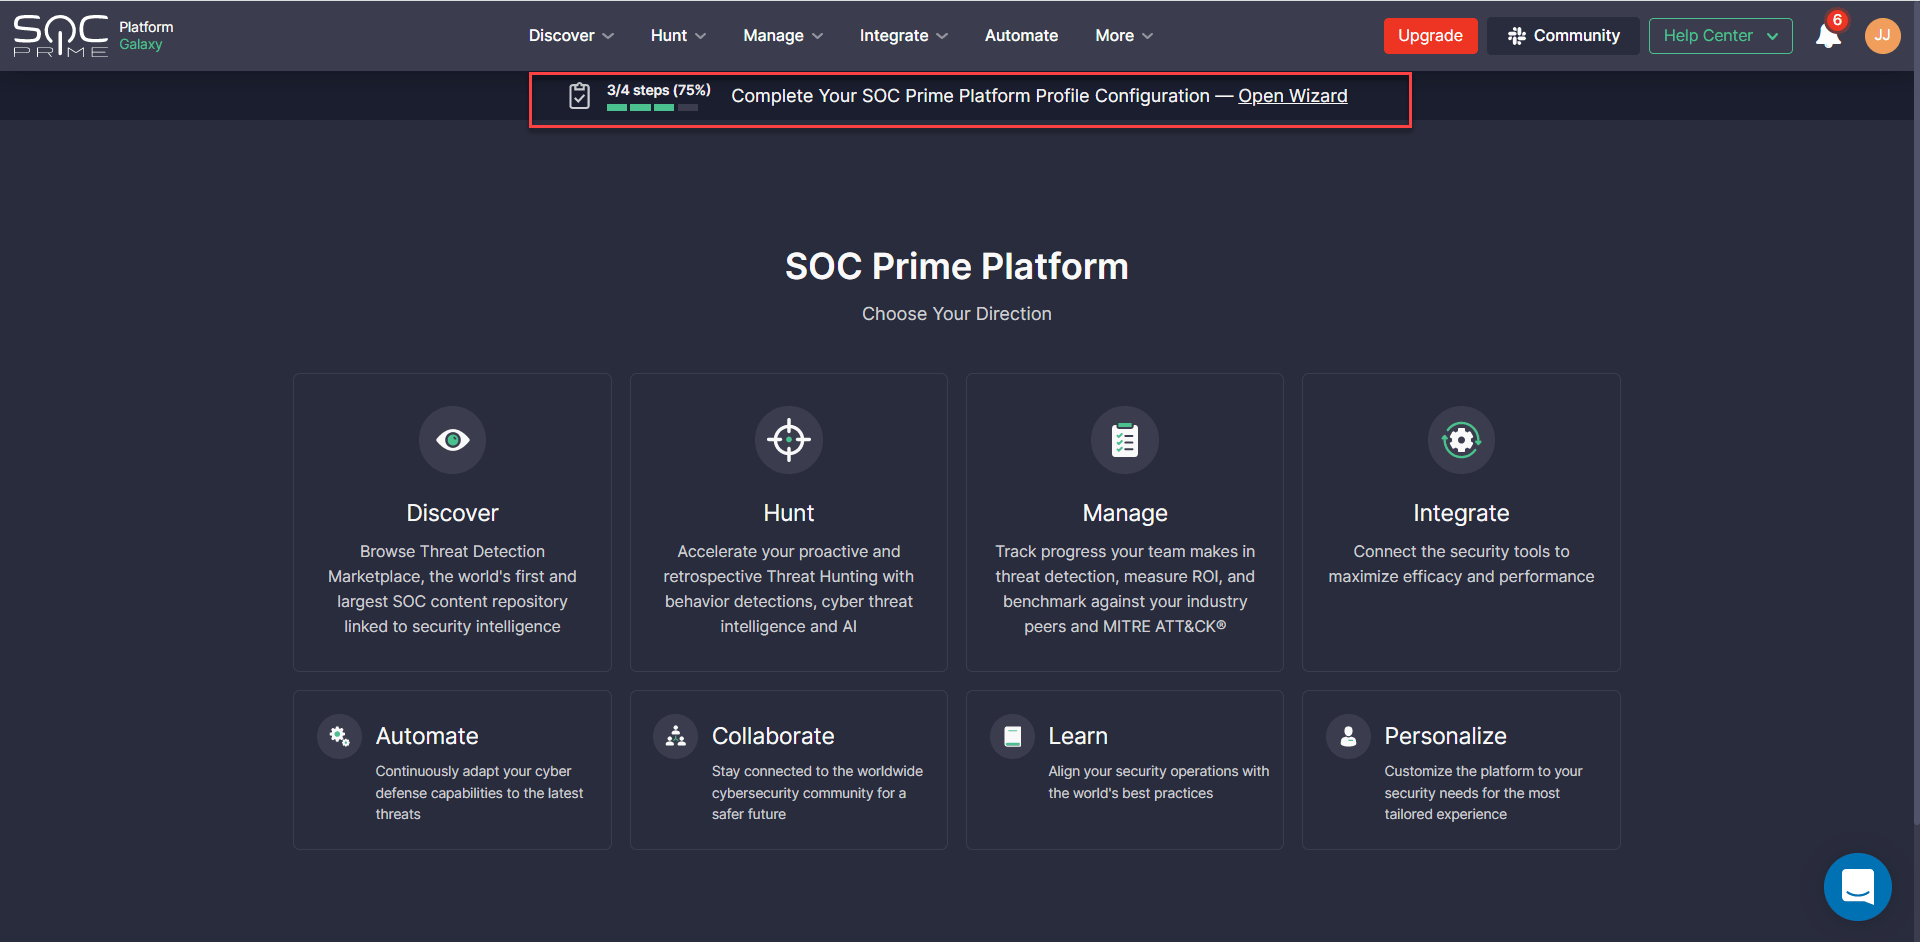
With this release, all new users who sign up for the SOC Prime Platform will be prompted to assign configurations after creating an account. Security practitioners who have an existing account will see a notification at the top of each page prompting them to populate missing settings from the preceding step. If you have already set up configurations required for proper platform use, they will be automatically populated in the onboarding wizard.
Onboarding Workflow
The onboarding wizard is a required one-time configuration process for all new users, so we can make sure that the SOC Prime Platform enables teams to drive immediate value.
The onboarding process includes the following steps*:
*The number of required steps is platform-dependent. Not all of the above-referenced steps are applicable.
Welcome Screen: Platform Selection
The onboarding process starts with the Welcome screen where security practitioners are prompted to select the platform in use. To choose the platform, click the corresponding tile and you will instantly move to the Search Profile step. You can always change these settings and return to the initial step by clicking Change.
For a better user experience, there is a progress bar displaying a number of completed steps (depending on the selected platform) and your onboarding progress (in %).
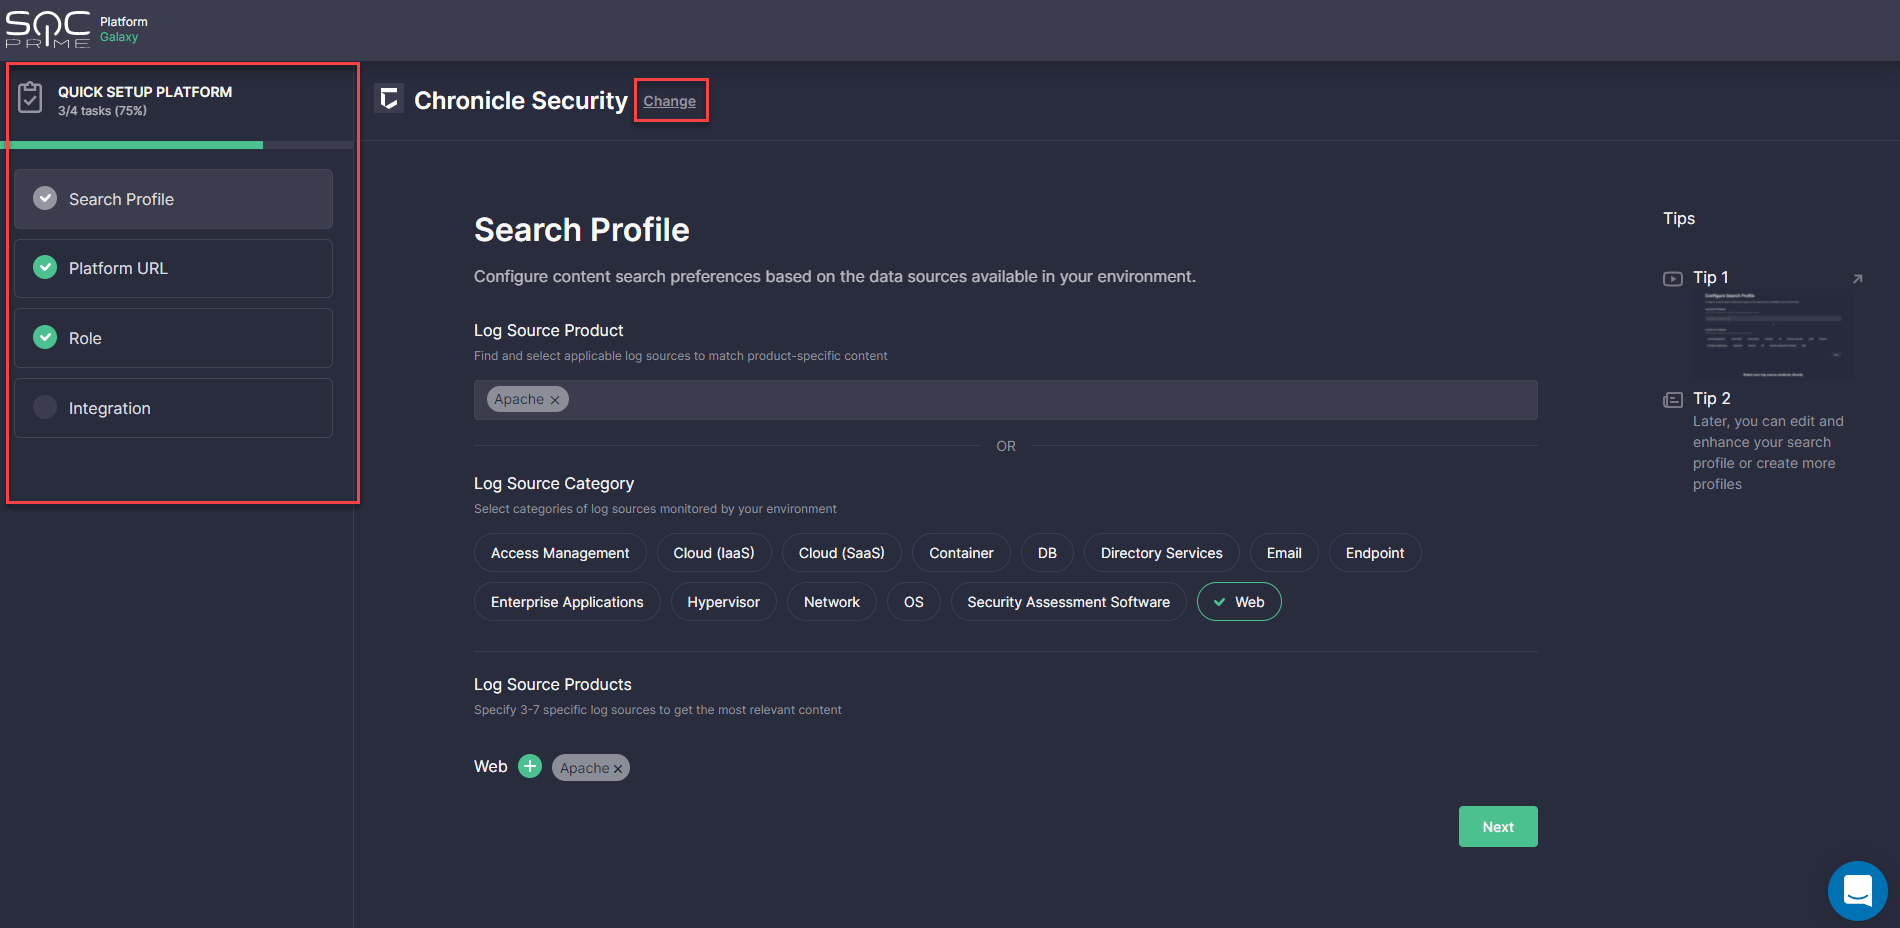
Search Profile
At this step, InfoSec practitioners are prompted to configure content search preferences based on the data sources available in their environment. For your convenience, these settings can be configured in two ways:
- By directly adding log source products from the list of predefined options
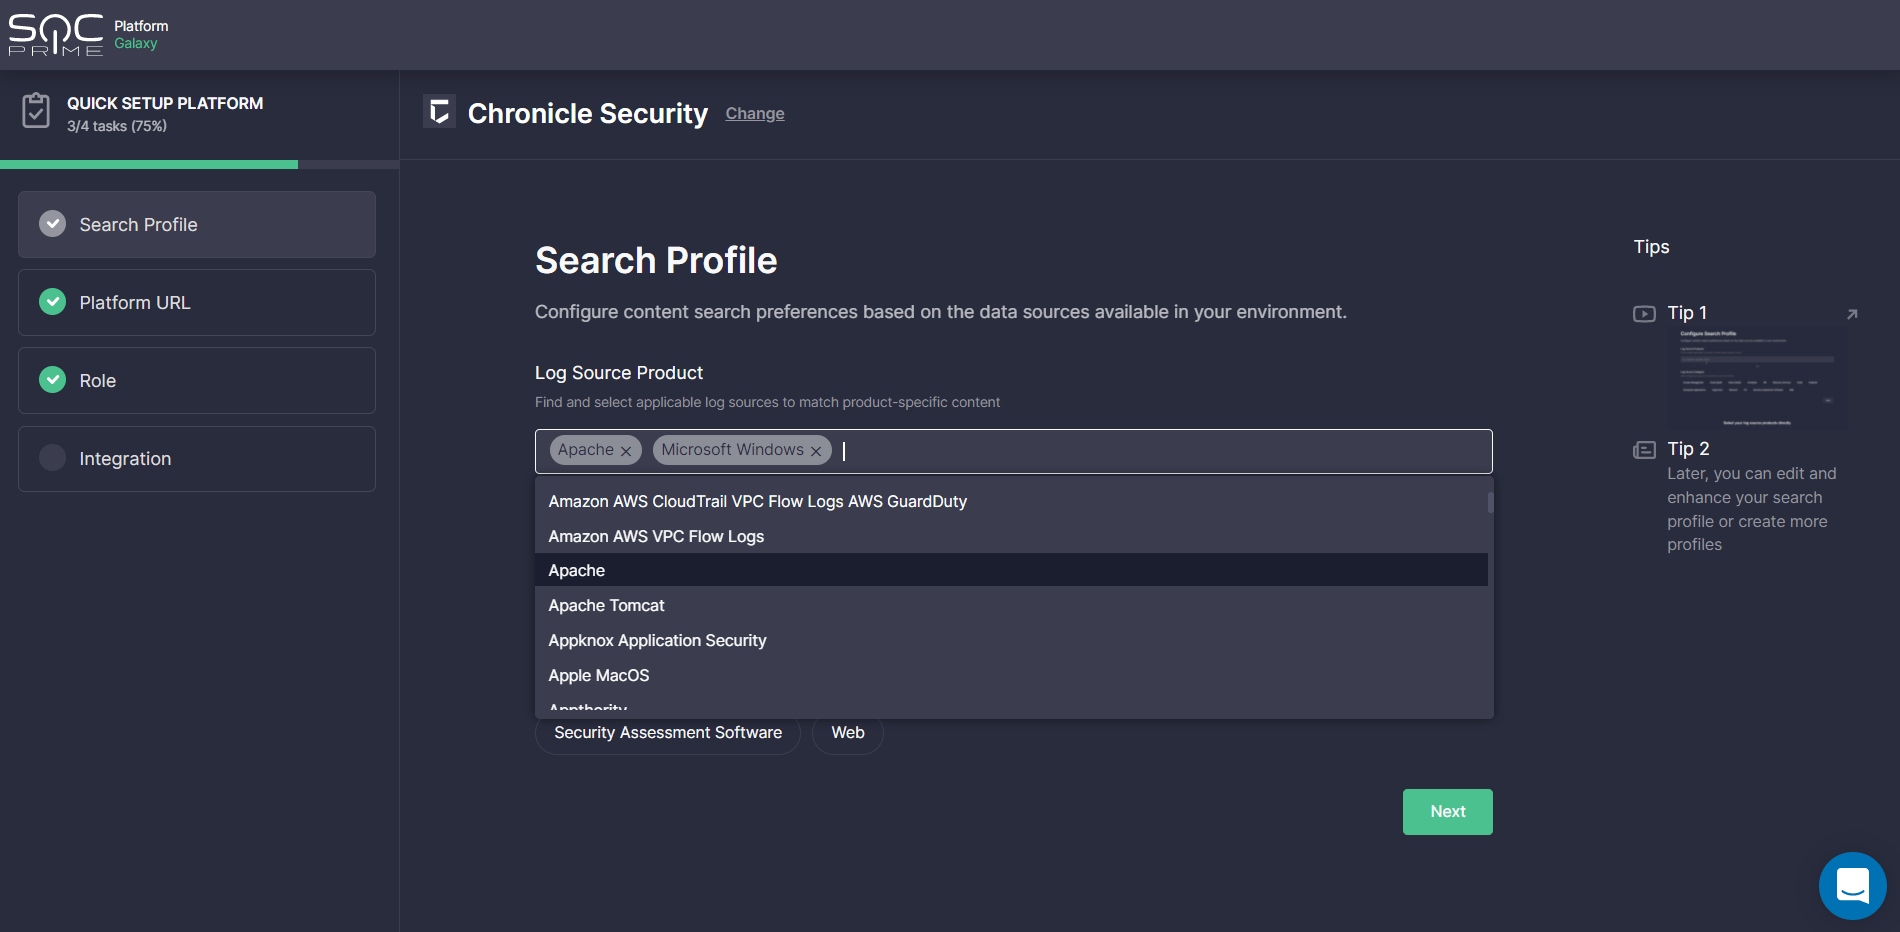
- By first selecting the categories of log sources monitored by the organization’s environment from the list of options (like “Access Management”, “Cloud (IaaS)”, “Cloud (SaaS)” and then the products matching these categories
By choosing the second option, once the category is selected, you can browse and add log source products that belong to it. Click the Plus icon next to the log source category, set the checkmarks against the items you monitor, and select Apply. You can select multiple log source categories at once with a number of products matching them.
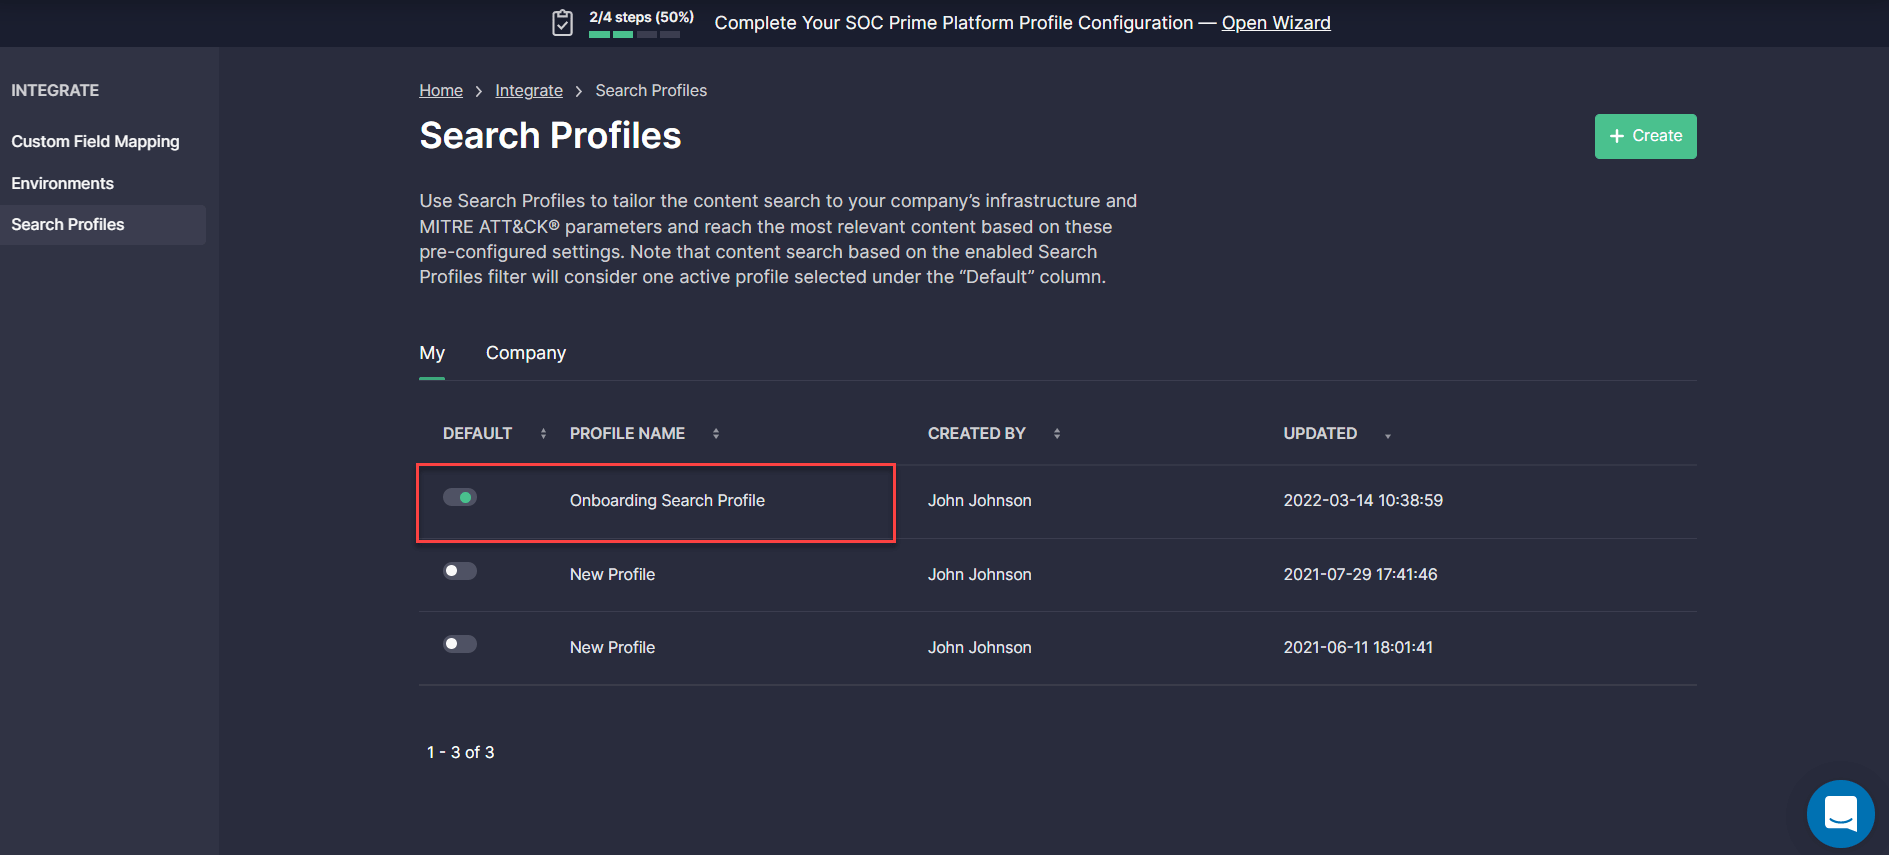
Once configured, the Onboarding Search Profile is automatically added to the Search Profiles section and can be applied on the Advanced Search page, MITRE ATT&CK® Coverage, and Log Source Coverage dashboards for the most relevant content selection.
Platform URL
This step is required for setting up a hunting environment to enable teams to drill down to search for threats in their environment using the Quick Hunt and Uncoder CTI modules.
To complete these settings, enter the required web address in the corresponding field, and you are all set to make the most of SOC Prime’s Hunt modules. For more details on how to get started with these tools, please refer to the dedicated Quick Hunt and Uncoder CTI blog articles. Also, all SOC Prime Users are welcome to access the Uncoder CTI capabilities for free through May, 25 — check out the promo details.
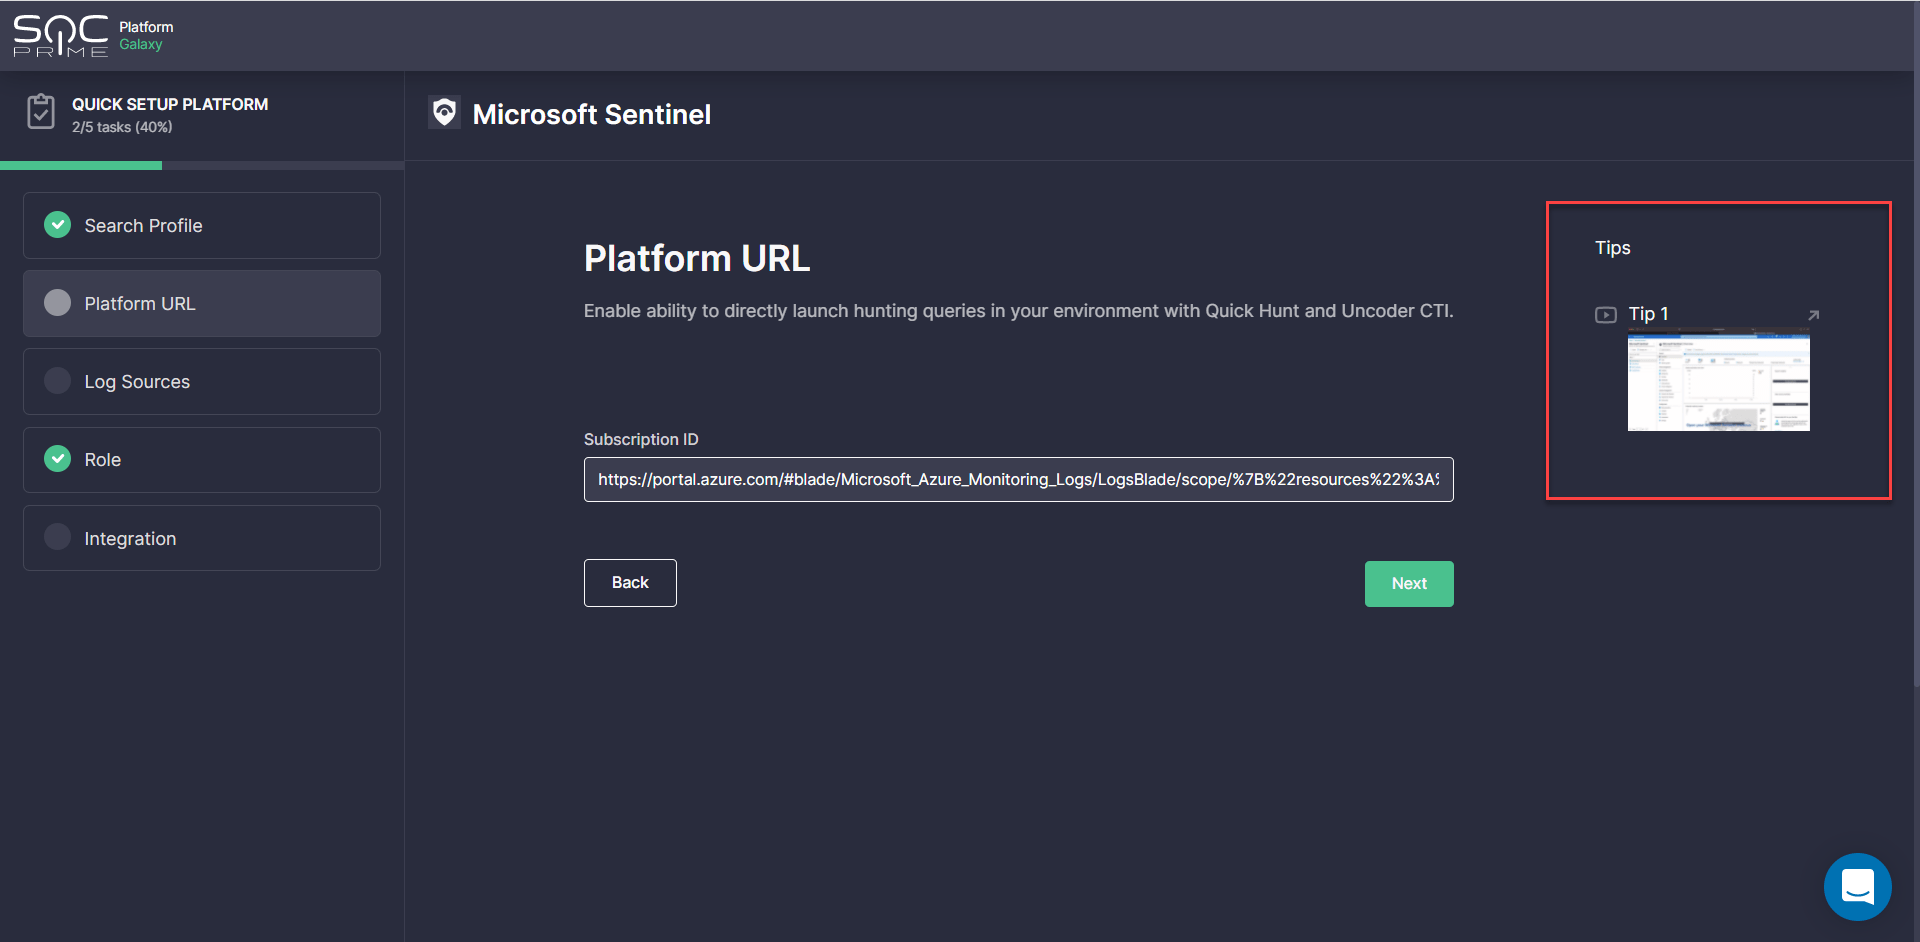
Newcomers to the SOC Prime Platform who might need help with the Platform URL configuration are welcome to watch a short video in the Tips section on the right. We’ve added a brief video tutorial for each platform making it easier for SOC Prime users to complete the required settings.
Tips are available at each step of the onboarding wizard. Make sure to follow them to make your onboarding as simple as possible.
Log Sources
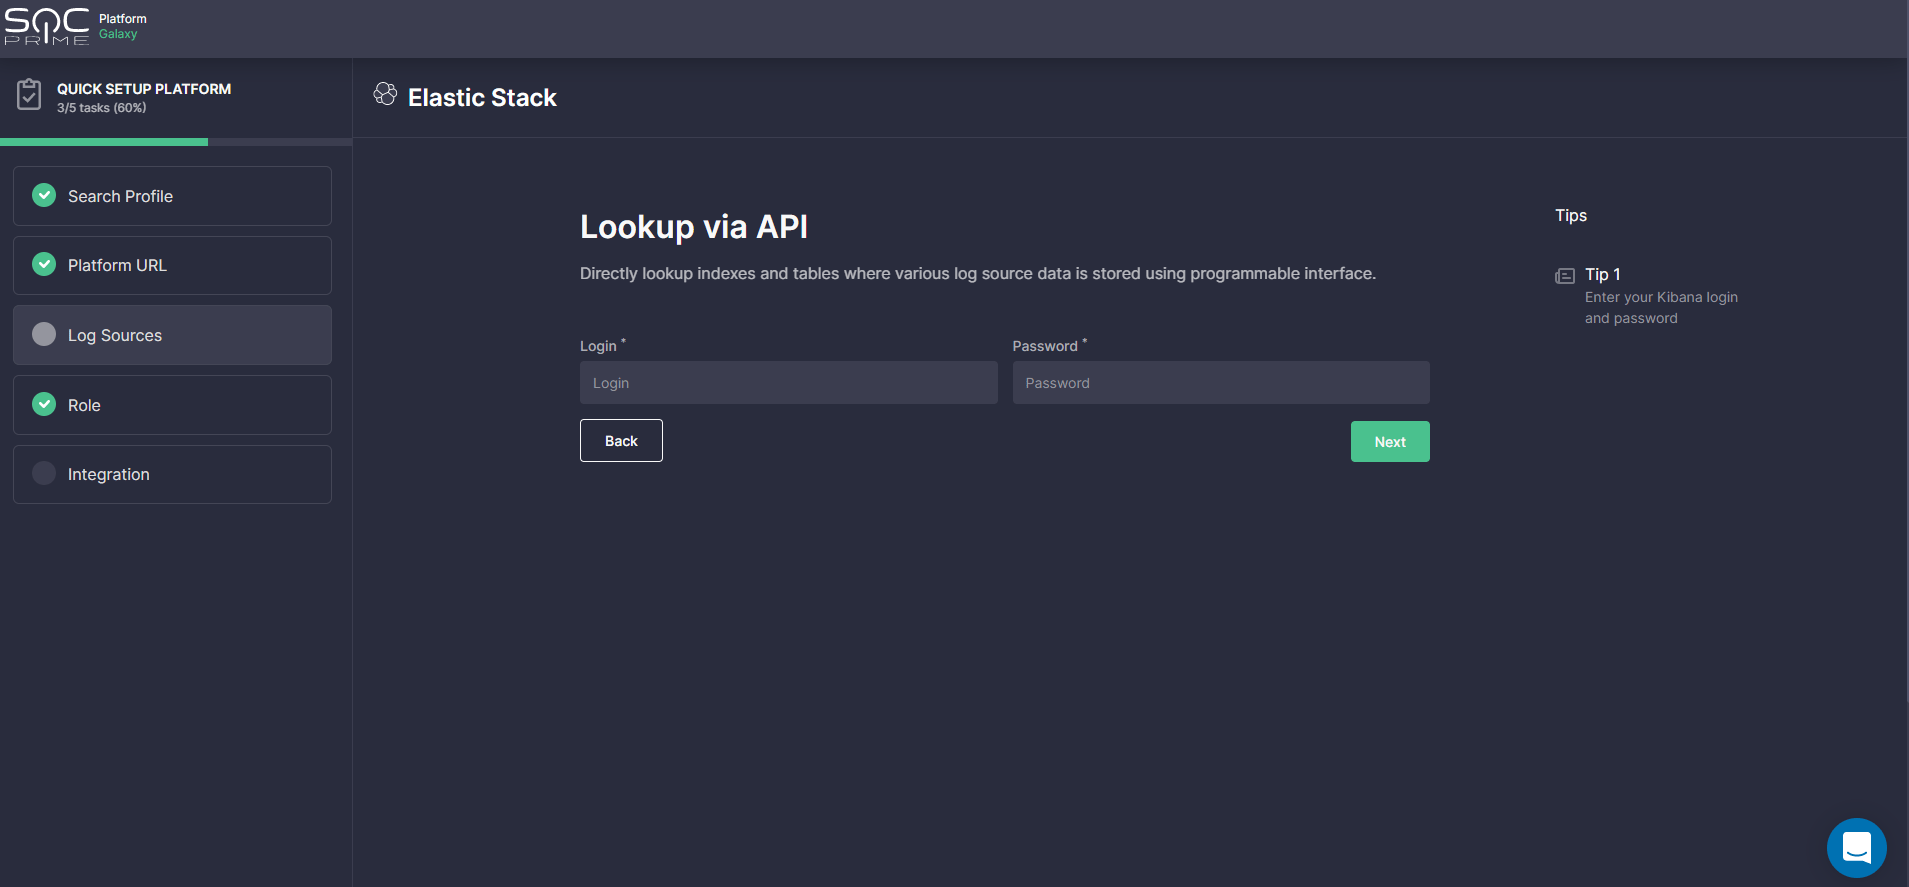
At this step, security practitioners are prompted to indicate the indices or tables where the log source data of the products selected during the Search Profile step is stored. This information ensures that the detection content available in the SOC Prime Platform will work properly even if the target environment uses non-default log source locations.
Depending on the selected platform, the following options are available to indicate the organization-specific log sources:
- Lookup via API — this is the recommended option, which enables teams to get the data locations automatically by requesting them via your security platform’s API.
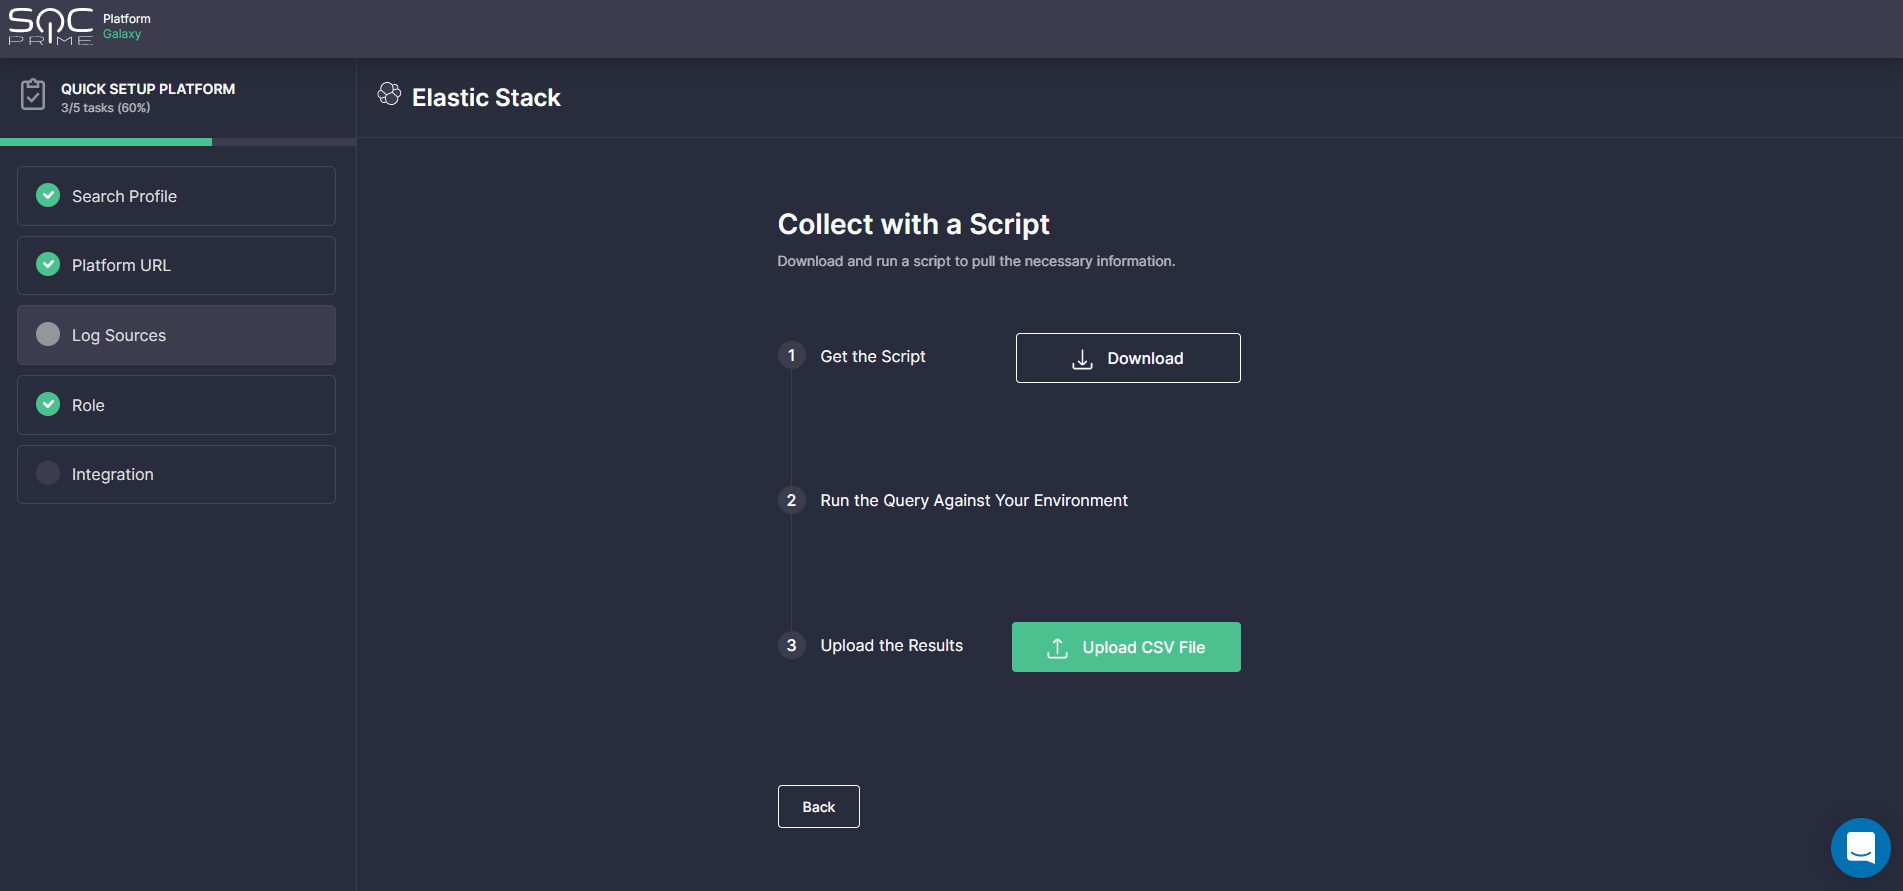
- Collect with a Script — prompts security practitioners to pull the necessary information by downloading and running the dedicated stript in their local environment and then uploading the output CSV file to the SOC Prime Platform.
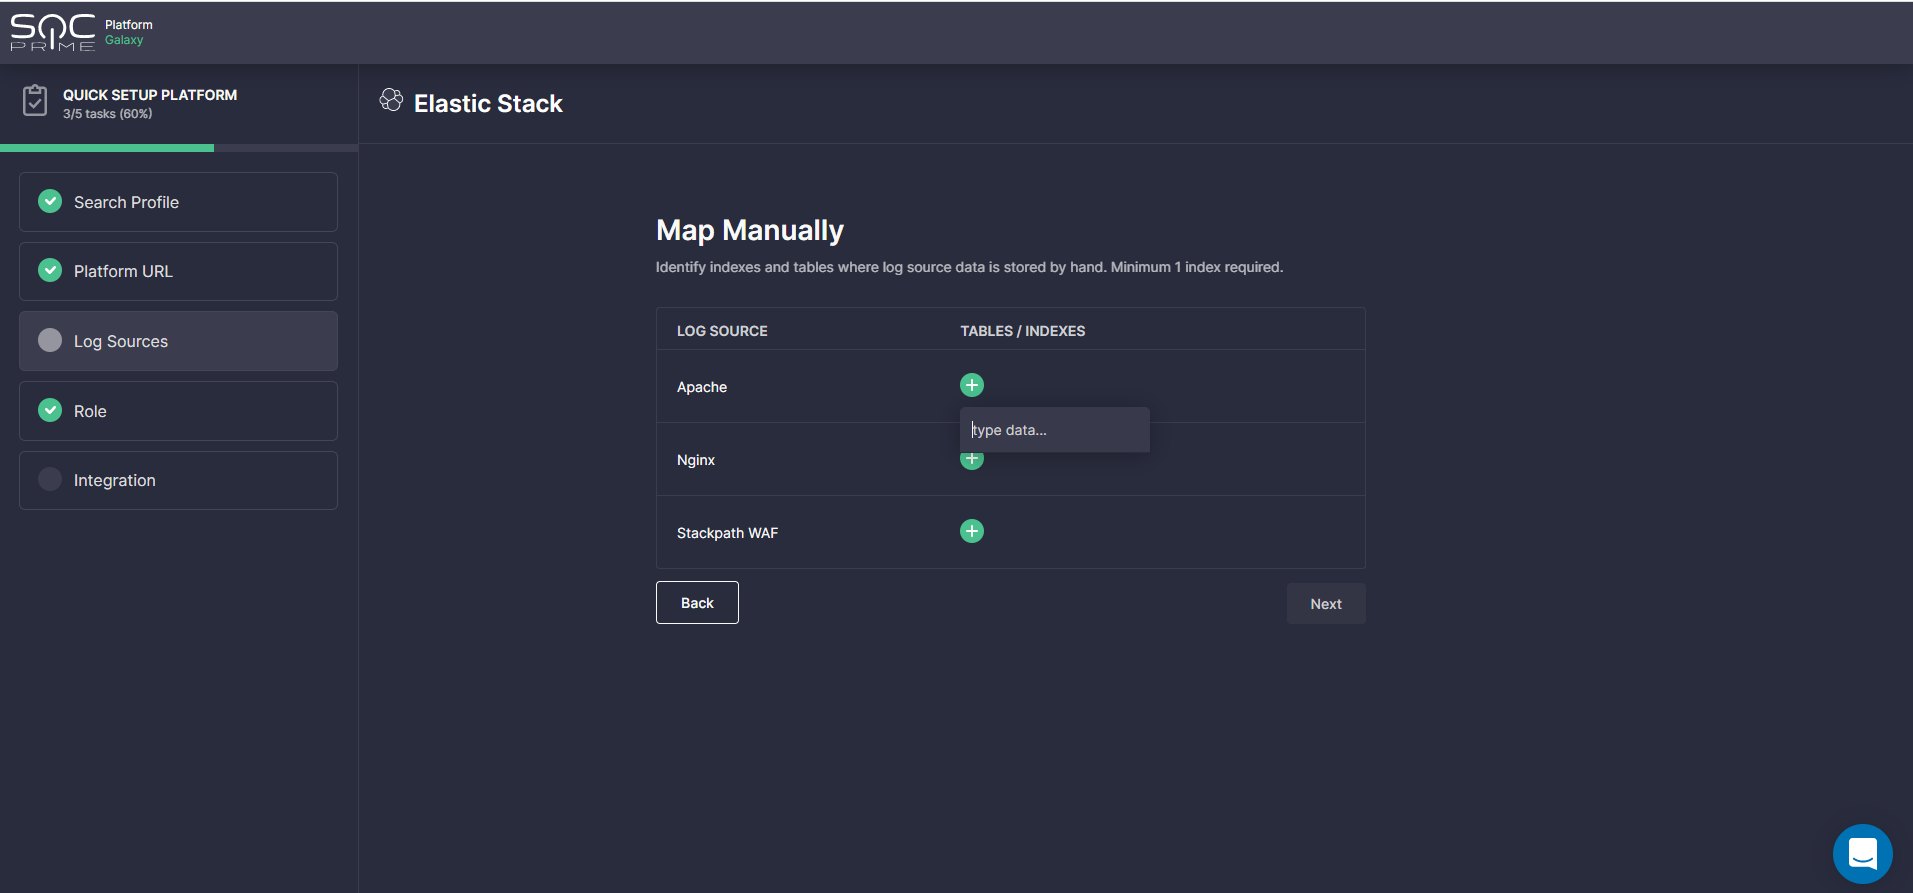
- Map Manually — prompts teams to fill in the settings manually. To complete the setup in this way, click the Plus icon next to the log source product selected in the Search Profile settings and then enter the name of an index or table where the data is stored.
Role
Here InfoSec practitioners are prompted to select one or two of their main roles to tailor the platform to their professional needs. This step is optional, however, we recommend filling in this information to make sure teams can gain the most personalized platform experience.

Integration
At this step, security professionals are prompted to set up an API integration with the platform environment.
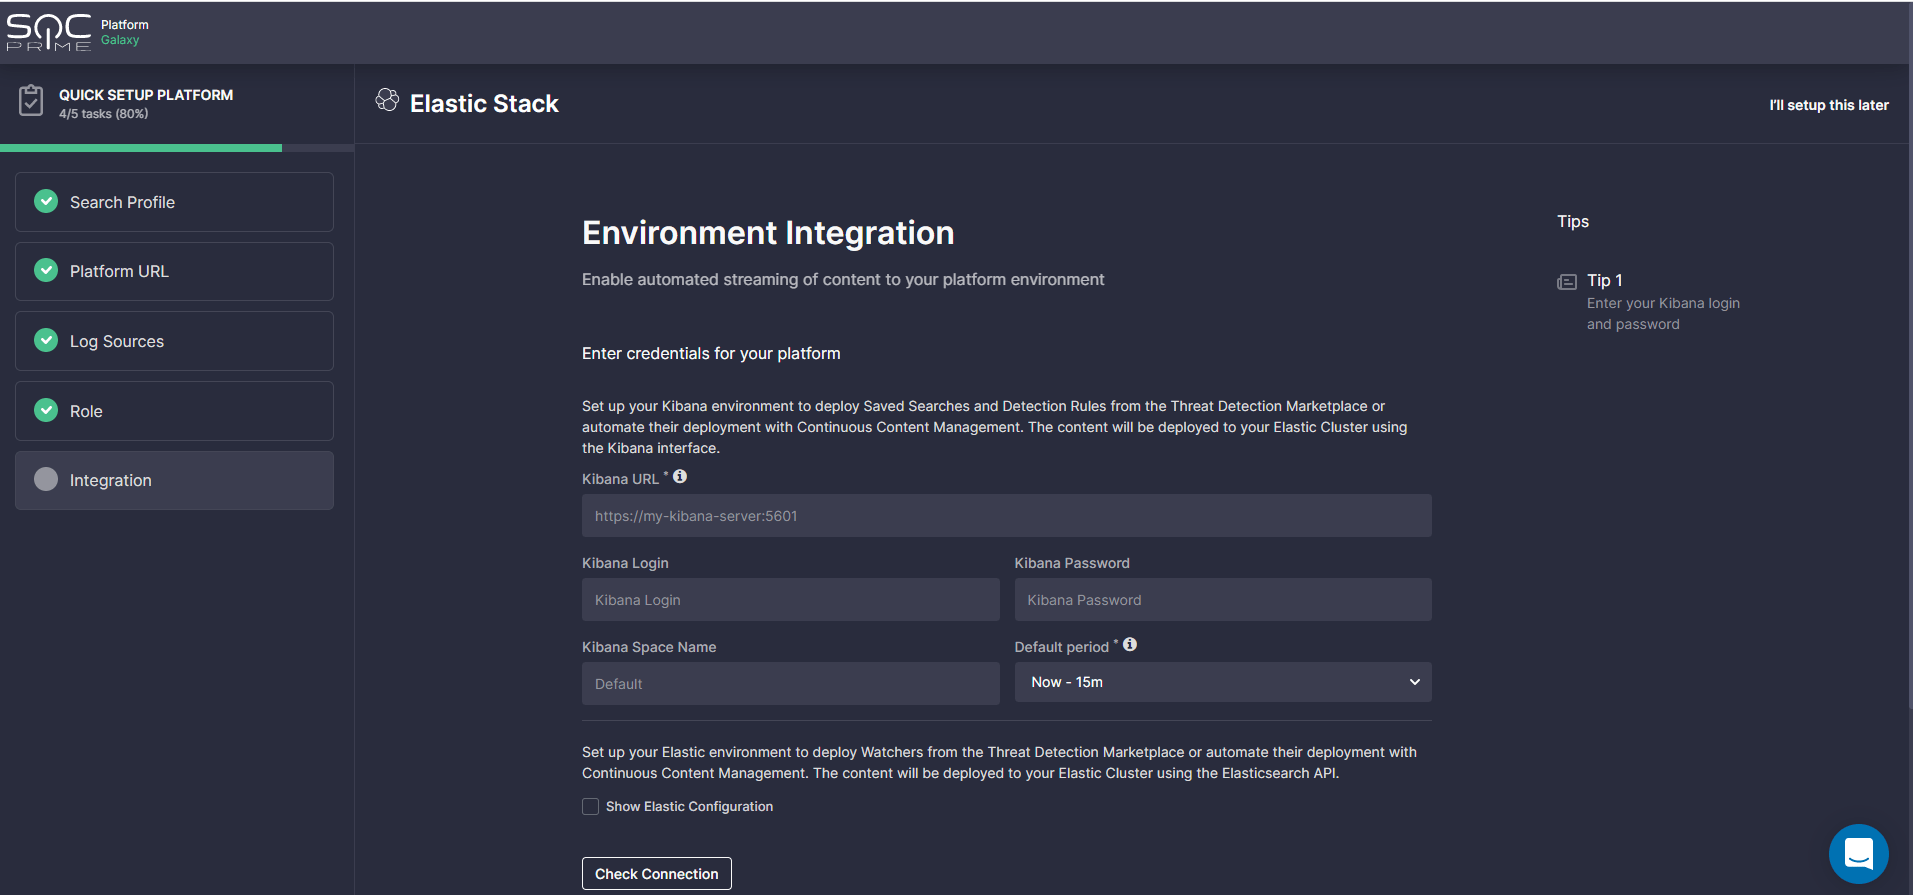
Please note that these settings are necessary to enable the following functionality of the SOC Prime Platform:
- Automated content adoption via Detection Engineering, Advanced Search, and MITRE ATT&CK®
- Automated streaming of the most relevant detections directly into your SIEM or XDR via Continuous Content Management
- On-the-fly hunting capabilities using Uncoder CTI and Quick Hunt modules
The link to the environment (if any) is automatically populated using the URL provided at the Platform URL step. SOC Prime users need to fill in the rest of their credentials to complete the setup.
Once the onboarding workflow is complete, SOC Prime users will be notified with the corresponding success notification and are all set to gain from the platform capabilities tailored to their security needs.

Help and Support
Security practitioners can reach out for help anytime they find challenges with the onboarding process in one of the following ways:
- Ask the Slack Community experts via a Slack channel or send a prompt Help Request
- Receive real-time support via the Intercom chat
Log Source-Based Custom Field Mapping
As part of this onboarding release, we have also enhanced the Custom Field Mapping capabilities for a more streamlined experience with the platform. The redesigned Custom Field Mapping functionality now offers extended customization options covering log source location (tables or indices), as well as field values, in addition to the already existing field names.
With this updated functionality, teams no longer need to manually customize the log source location. After one-time setup, it will be automatically applied for all subsequent content deployments to the corresponding security platform.
The information provided during onboarding is automatically populated in the corresponding fields of the Custom Field Mapping profile configuration. For each log source product selected at the Log Sources step of the onboarding process, a separate Custom Field Mapping profile will be automatically created.
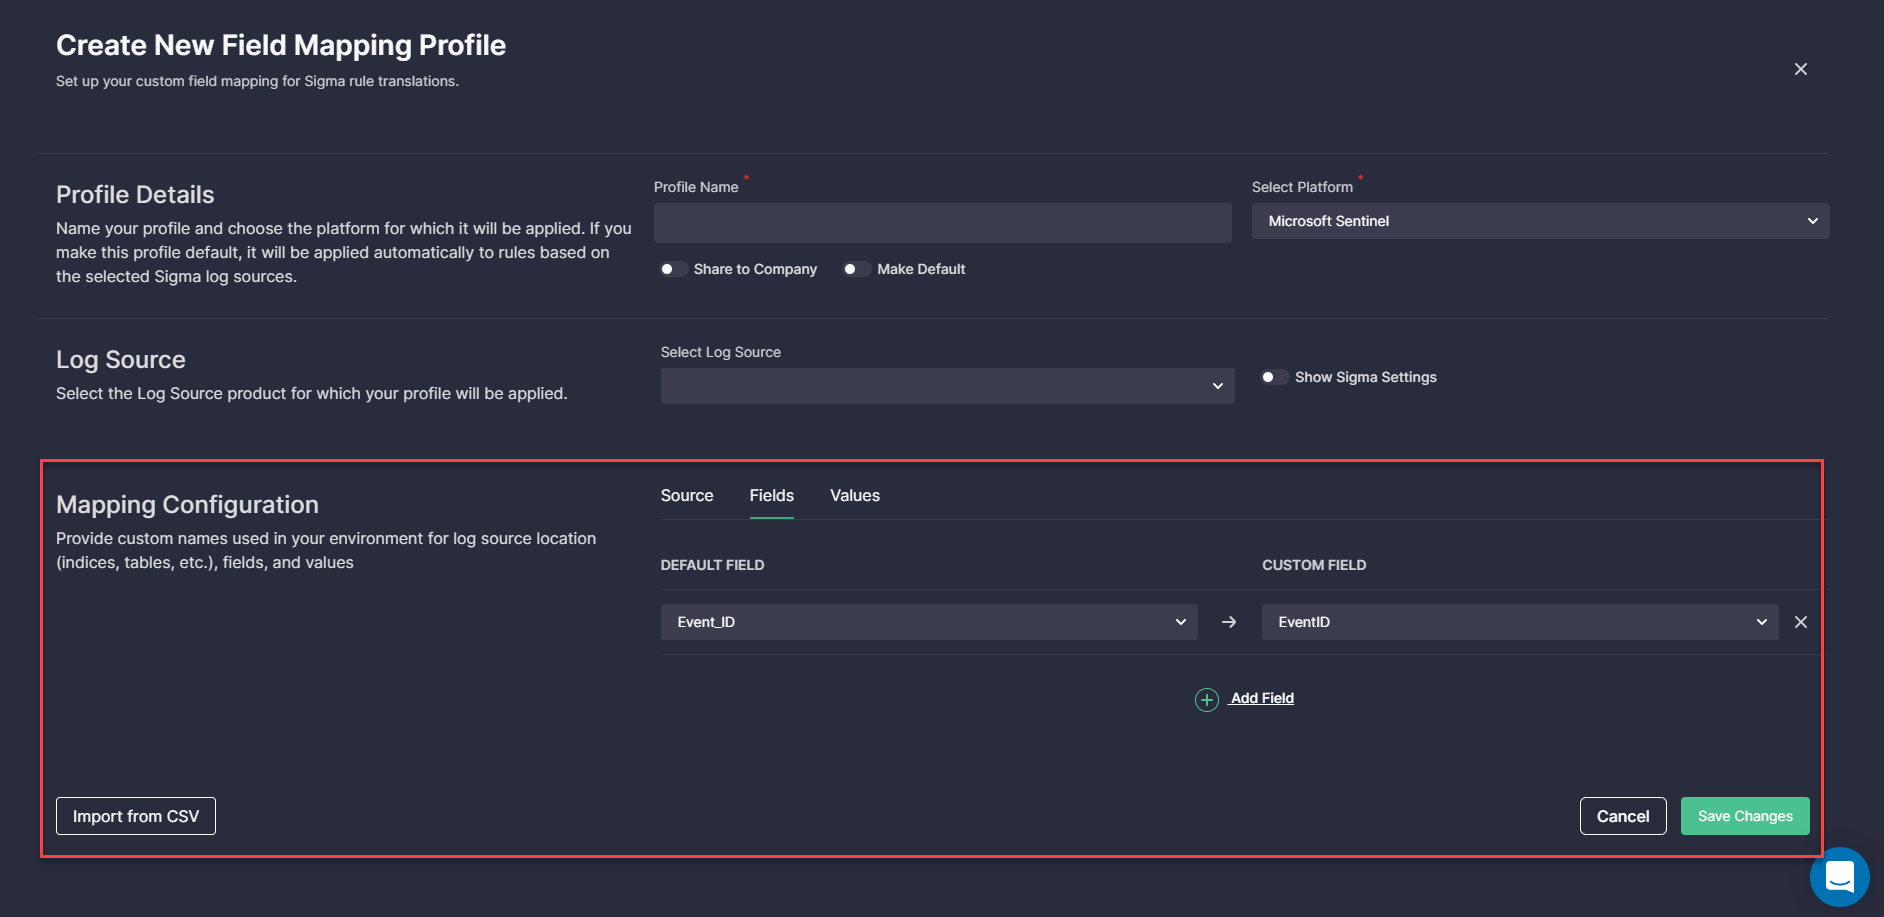
The Custom Field Mapping profile setup now consists of the following steps:
- Fill in the Profile Details.
- Add the profile name.
- Select the platform in use.
- Optionally, make the profile access company-wide by selecting Share to Company.
- Apply this profile by default to the detection content for the indicated platform by selecting Make Default. Once selected, after saving the Custom Field Mapping profile for a certain log source product, it will be automatically applied for the corresponding platform-based log source on the content item page.
- Select the log source product the profile will be applied to.
- Enable Show Sigma Settings to check or edit the product, category, and service which should be indicated in the Sigma rule for this profile.
- Provide custom names used in your environment:
- Source (table or index names)
- Field names — allows adding custom field names manually or automatically pulling them by clicking the Import from CSV button
- Field values — settings for more advanced users with the ability to add a suffix or a prefix to the field value and other customization options
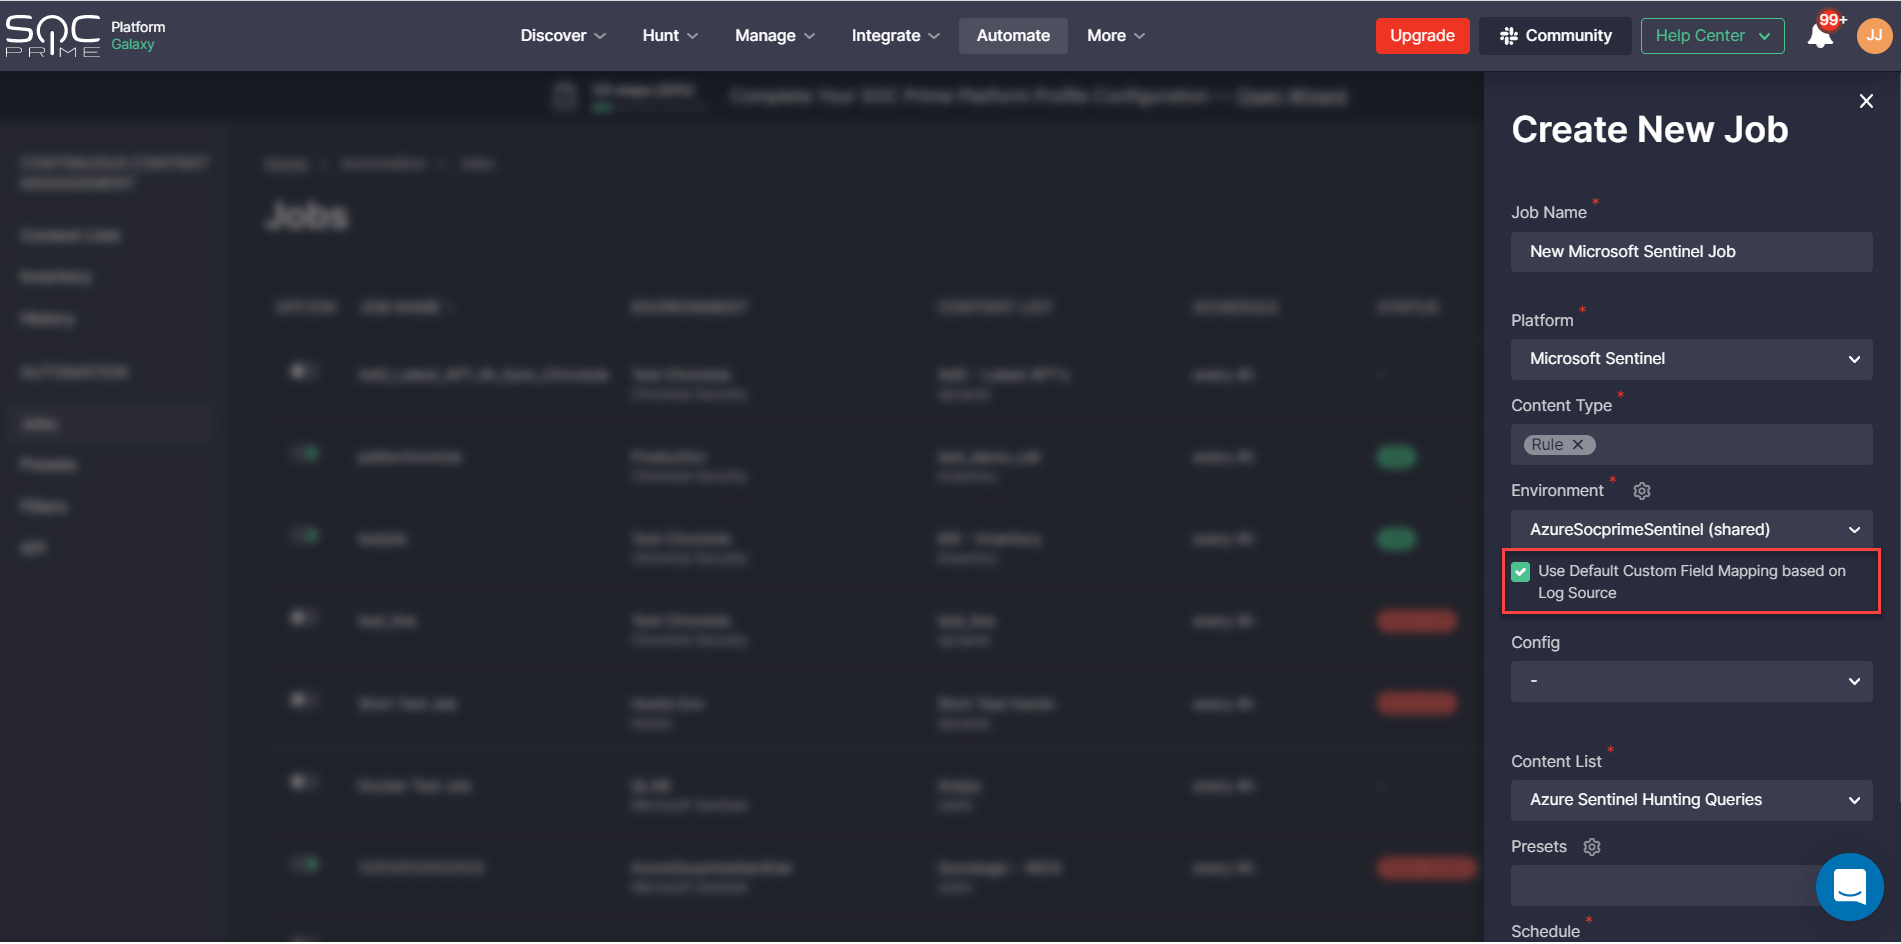
Also, we have updated the default Jobs settings in the Continuous Content Management module for more streamlined content streaming. Jobs now automatically apply the default Custom Field Mapping profile set for the corresponding log source. By disabling these settings, teams can manually select another Custom Field Mapping profile if needed.
Keep up with our latest updates to improve your organization’s cybersecurity posture with SOC Prime’s largest and most advanced cyber defense platform. Eager to contribute to collaborative cyber defense? Join the crowdsourced Threat Bounty Program by sharing your cybersecurity expertise through curated content contribution and monetizing your input.