SOC Prime Introduces Continuous Content Management
SOC Prime Introduces Fully Automated System of Continuous Content Management
Continuous Content Management (CCM) is an add-on module for SOC Prime Threat Detection Marketplace. In the November release, we introduced the Automated Content Management system to create a more intuitive platform experience. Here we are going to cover the principal capabilities of the CCM module and how the fully automated Content Management system enables security experts to stream the latest SOC content right into their SIEM instance and take content management to a new level.
Read our blog post on how to gain access to the module and properly set up integrations for your SIEM to enable Continuous Content Management.
Organizing SOC Content Into Static and Dynamic Content Lists
The newly released functionality of the Continuous Content Management module enables security performers who use Microsoft Azure Sentinel and Elastic Cloud to arrange all their SOC content in the form of neatly structured content lists. Customization to the environment settings and content preferences can be applied to:
- Dynamic lists that are continuously updated based on the previously added tags
- Static lists that display all saved user preferences

All lists are grouped in the following way:
- All — all content lists (both static and dynamic)
- My — content lists created by the specific user
- Recommended — content lists recommended by the Threat Detection Marketplace Admins. They normally address the latest and most topical threats or possess another tangible value to security practitioners.
Security professionals can search for the specific lists by:
- Name
- List type (static or dynamic)
- Number of items the list contains
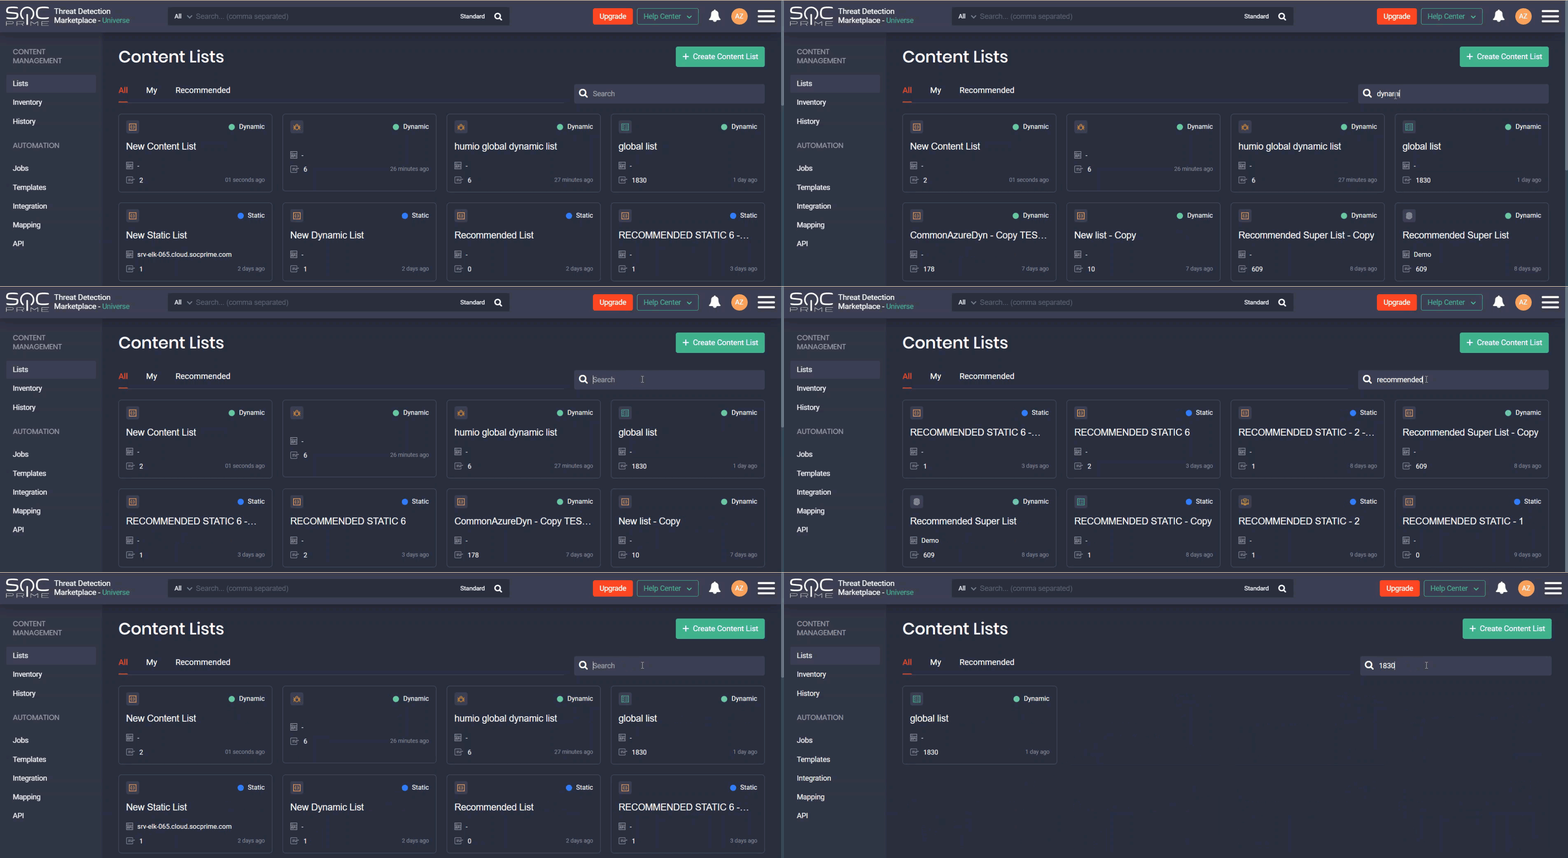
The following actions are available with the content lists depending on their types:
- With all content lists:
- Creating new lists
- Editing lists
- Deleting lists
- Copying lists
- With static content lists only
- Adding items to the content list manually
- Deleting specific items
- With recommended lists only
- Copying lists*
*Recommended lists can be edited only by the Threat Detection Marketplace Admins. If you do not have Admin privileges, you won’t be able to edit or delete these lists, only copy them.
 You can delete specific items only from the static content lists. Dynamic lists can be deleted only with all items they contain.
Copying Content Lists
Where before you had to create content lists from scratch, you can now streamline building your new content lists based on the already existing items. This can be useful when you need to create a new list that only slightly differs from the already existing one. You can create a copy of a similar list by selecting the Copy List option, add all the required changes and save the list copy. After saving, the item will be added to the Content Lists page with the word “copy” in the list name.

Automated Content Deployment and Updates Using Jobs
On the Jobs page, you can now deploy new and update all the existing content items available in your Azure Sentinel or Elastic Cloud instance by setting up and scheduling jobs for created content lists. This allows viewing all action logs and tracking all successful and failed content deployments.
A job compares each content item from the content list with all the existing content that is listed on the Inventory page. If there is no such content item on the Inventory page, such an item will be automatically deployed in the configured API profile of your SIEM.
A job can run under the following conditions:
- If the inventory was successful at least once for the last 24 hours
Once it is enabled on the Jobs page by turning the switcher toggle ON under the corresponding column

NEW: Creating and Linking Custom Rule Templates to Jobs
The new functionality in the latest CCM module release allows creating and managing custom rule templates and linking them to newly created jobs. This helps streamline the content management operations and avoid errors that can occur when manually editing the rule.
You can create rule templates for the following platforms:
- Azure Sentinel
- Elastic
- Humio
- Sumo Logic*
*You can create rule templates for all these platforms, but currently you can link and then run associated jobs only for Azure Sentinel and Elastic Cloud.
To create a new rule template:
- Select Automation > Templates.
- Click the Add Rule Template button.
- Select the supported platform and content type (if applicable).
- Click the Add new template option from the Template drop-down list.
- Provide the rule template name and choose whether you want to share it with your company.
- Fill in all the required fields, which will differ depending on the platform you’ve selected, like Query Period, Severity (“Low”, “Medium”, “High”, “Critical”), Rule Status (“Enabled”, “Disabled)”, etc.
- Optionally, you can configure exceptions by clicking the Exceptions Settings button.
- Click the Save Changes button, and the created rule template will appear at the top on the Templates page.

All available rule templates are listed on the separate Templates page within the Continuous Content Management module:
- Templates created by you
- Templates created by your team members and shared across your organization

After creating a new rule template, you can then link it to the specific job before running this job for automated content deployment or other actions.
You can also manage rule templates in the following way:
- Edit the template
- Delete the template*
*By deleting the rule template, all active jobs linked to it will be disabled.

Threat Detection Marketplace users can perform the following actions with the created job:
- Edit this job
- Debug logs for failed content item deployments
- Delete this job from the list

Reviewing Content Inventory in Your SIEM
On the Inventory page, you can review and update all the content items available in your Azure Sentinel or Elastic Cloud instance. The inventory is scheduled to run every hour. Users cannot change these settings.
Edit a Single Content Item
You can update content items that are of various sources, even those that do not stem from Threat Detection Marketplace by selecting the Edit Content option from the action menu.

After making changes to the source code, you can then deploy them on the fly right into your SIEM instance with a single click.

Actions with Multiple Content Items
You can also manage multiple content items at a time by selecting one of the available actions:
- Enable All — turn on all selected content items that were disabled
- Disable All — turn off all selected content items that were enabled
- Delete — delete all selected content items
- Clear Deleted — remove all content items that were marked as “Deleted” (deleted from your Azure Sentinel or Elastic Cloud instance) from the Inventory page

Marking content as “Deleted” helps check out all content items that have been removed from your SIEM instance. By clicking the Clear Deleted button, these content items will no longer be listed on the Inventory page, but if they are still available in your SIEM instance, they will appear here on the Inventory page once again.
Streamlined Logging with the History Page
Each automated or manual action within the CCM module is logged with the detailed results and can be reviewed on the History page. Here you can see all the logs from jobs, manual deployments, and updates.
The Inventory Log switcher toggle on the History page allows controlling which logs to display. When the switcher toggle is off, you will be able to focus only on the deployment logs rather than being distracted by all logs sent by the system.
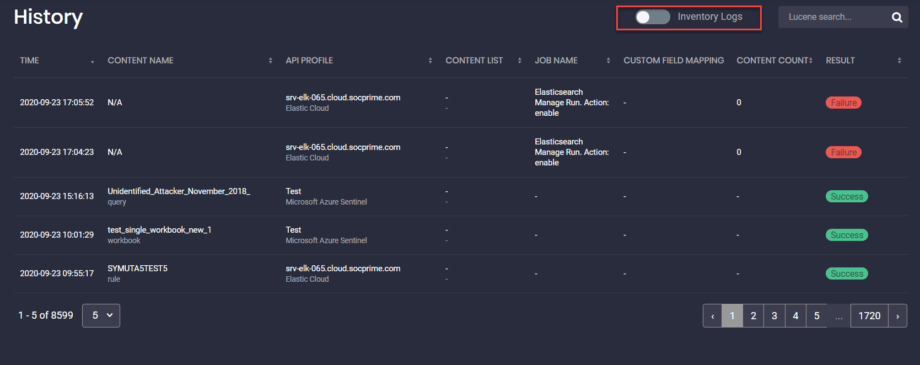
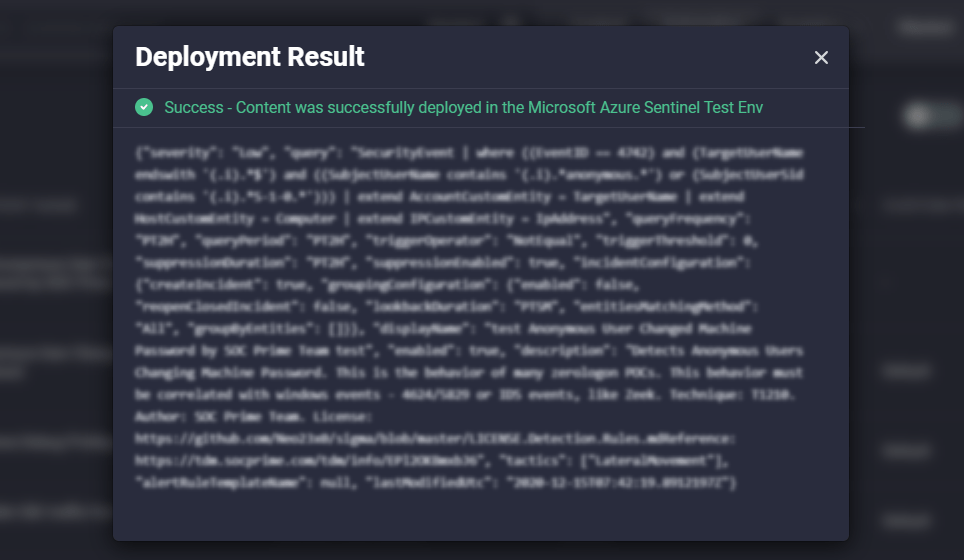
To view the deployment result for each content item on the History page, click the Deployment Result status in the corresponding content item row for the content item you want to inspect. You will see the notification pop-up with the details of the rule deployment (successful or failed).
In case of a successful deployment result, you will be notified that content has been successfully deployed to your SIEM environment with the details of the HTTP request.
If the deployment has failed, you will be notified of an issue with the error details, including the failed HTTP request.
Advanced Search Capabilities with Lucene Query Syntax
You can use the Lucene query syntax on the Inventory and History pages using supported fields in the queries to search for the specific SOC content. For example, to display only queries for the Azure Sentinel platform, use the following syntax that includes the content.type field and its predefined value:
content.type:”query”
|
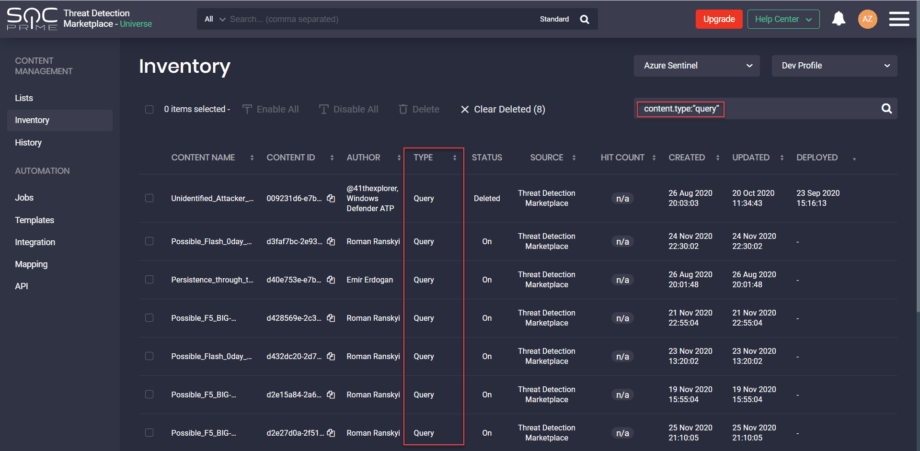
You can search for content using all fields available for the advanced search with the Lucene queries.
Want to delve into more detail? Check out the CCM Guide we’ve added to the Help Center, so the Threat detection Marketplace users who are new to this module can explore all the content management capabilities it offers for a more streamlined platform experience.
Visit our website for more details on how to purchase the CCM module or try it for free.

New to Threat Detection Marketplace? Sign up to supercharge your security capabilities with access to 85,000+ threat detection and response algorithms, machine learning models, dashboards, parsers, and configs convertible to 20+ SIEM, EDR, and NTDR technologies and mapped to MITRE ATT&CK®.

