Adjust Content Deployments to Non-Standard and Alternative Data Schemas
At the core of SOC Prime’s Detection as Code platform is the world’s largest library of SOC content. Rules are initially written in the Sigma language, a platform-agnostic rule format that allows leveraging the expertise of a global community of 23,000+ security experts. Then the Sigma rules are automatically converted into native formats of 25+ SIEMs, EDRs, and XDRs.
When converting a Sigma rule, we follow the currently standard data schema of the target platform. For example, a Microsoft Sentinel rule is based on Advanced Security Information Model (ASIM), and an Elastic Stack query on the Elastic Common Schema (ECS). The schema defines a set of fields used for parsing and normalization of data collected from log sources.
However, not all organizations use the standard data schema. This could be the case for various reasons, for example:
- Organizations may prefer alternative data schemas, such as Open Source Security Events Metadata (OSSEM) instead of Advanced Security Information Model (ASIM) for Microsoft Sentinel
- Vendors update their data schemas from time to time, and it’s not always technically feasible for organizations to keep up with the updates
- Organizations often have an internal need to customize the data schema
To empower organizations that use non-standard data schemas and help them ensure the detections work properly in their environments, the SOC Prime Platform offers two special features: Config for Alternative Translations and Custom Field Mapping.
Config for Alternative Translations
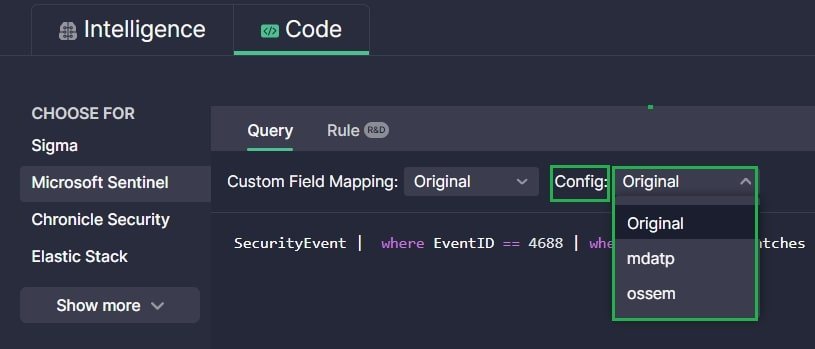
When an alternative data schema gains in popularity among organizations using a SIEM, EDR, or XDR solution, we start supporting it by adding an alternative translations configuration. Thus, users with a standard schema can use the default translations, and users with an alternative one can select their schema type in the Config drop-down and instantly get the translation tailored to their environment.
You can select Config for alternative translations:
- On the content item page to get an alternative translation for a specific Sigma rule
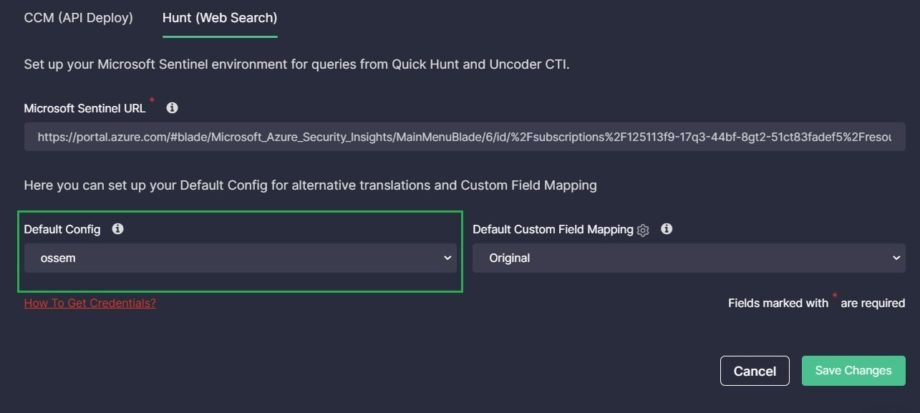
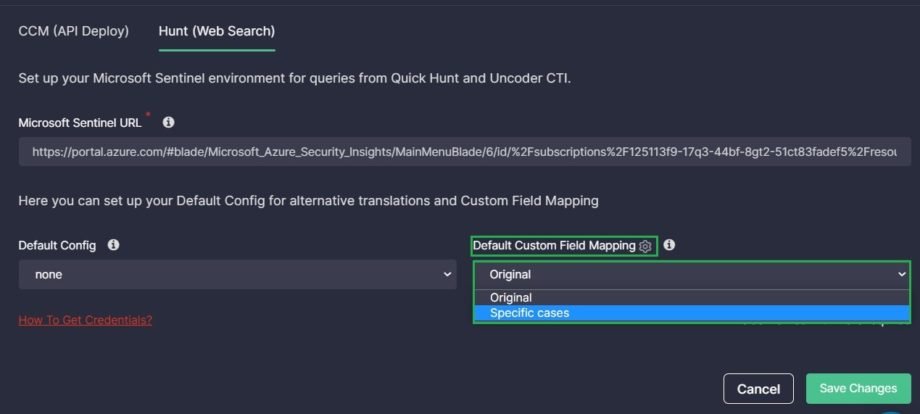
- On the Hunt (Web Search) tab of your environment integration setup in the Environments section to configure alternative translations used by default in Quick Hunt (if applicable for a particular platform)
- In Job settings in the Continuous Content Management module to configure alternative translations used for all Sigma rules associated with a particular Job

Custom Field Mapping
Sigma rule translations in the SOC Prime Platform are based on the standard data schema of the corresponding SIEM, EDR, or XDR solution. Accordingly, if non-standard tables/indexes or fields are used in the target environment, translated rules require customization.
Customizing tables/indexes, field names, or field values in the rule code manually is a tedious task prone to errors. That’s why we provide capabilities for configuring Custom Field Mapping profiles where you can specify all relevant custom tables/indexes, field names, or field values and map them to the default ones. Create a profile once, and apply it on the fly each time you deploy a rule or send a query to your environment. You can create multiple profiles and share them with your teammates.
This tool comes in handy in various cases:
- When the set of fields used in your organization’s SIEM, EDR, or XDR instance differs from that defined in the standard data schema of your platform.
- When you would like to query a different log data location in your SIEM, EDR, or XDR instance, for example, if you collect particular logs with a different tool. In this case, you may need to customize the location itself as well as the fields and their values for a particular activity.
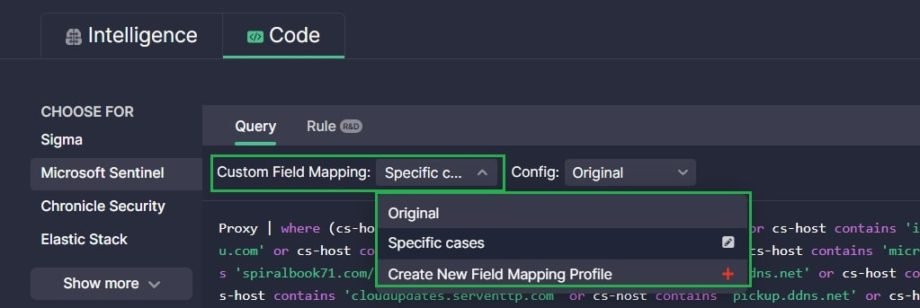
You can apply Custom Field Mapping profiles:
- On the content item page to modify a translation of a particular Sigma rule
- On the Hunt (Web Search) tab of your environment integration setup in the Environments section to apply modifications by default in Quick Hunt (if applicable for a particular platform)
- In Job settings in the Continuous Content Management module to configure modifications applied to all Sigma rules associated with a particular Job
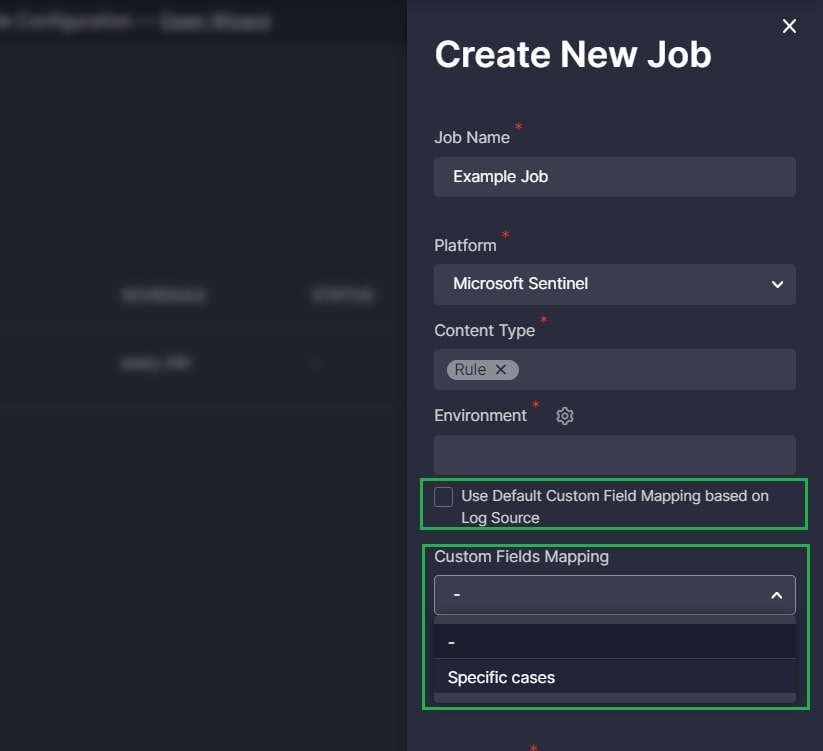
Note: By default, the Use Default Custom Field Mapping based on Log Source checkmark is selected. In this case, the Custom Field Mapping is dynamically applied to content based on the log source products the content is intended for. To show the Custom Field Mapping drop-down and select a single profile for all content linked to the Job or not to apply mapping at all, deselect the checkmark.
Set up a Custom Field Mapping Profile
Create a separate Custom Field Mapping profile for each log source product monitored in your environment and requiring customization.
Go to Integrate > Custom Field Mapping and click the Create button to create a new profile.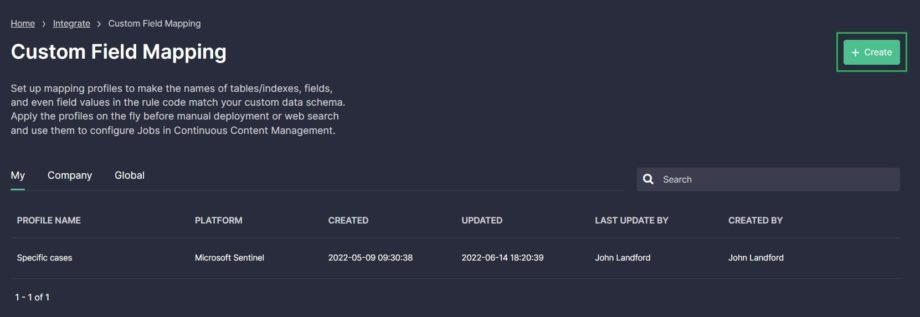
You can also open the profile creation or editing pop-up from a content item page or environment integration setup.
To set up a Custom Field Mapping profile:
- Give your profile a name.
- Select the platform for which you want to apply the profile.
- Choose if you want to share the profile with your teammates. A shared profile can be viewed and edited by anyone in your organization.
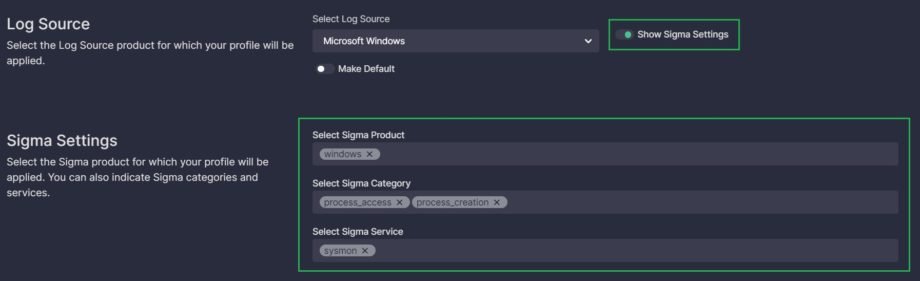
- Select the log source product for which the profile is intended and will be applied automatically (if the Make Default switch is enabled). Click the Select Log Source field, start typing the product’s name and select it from the suggested options.

- Optionally, you can enable the Show Sigma Settings switch to view the Sigma Product, Service, and Category to which the selected log source product corresponds. These are advanced settings intended for users well-acquainted with Sigma. You can remove predefined values by clicking the cross icon, and add new values, but we don’t recommend changing the predefined values if in doubt. To provide a new value, click on a field, type the value and click on the entered name to add it. Each field can have multiple values.
Note: Currently, the Select Sigma Product, Select Sigma Category, and Select Sigma Service fields have predefined values only for some log source products. Support for further products is coming soon. - Choose if you want to make the profile default. A default profile is applied automatically on the content item page to the content for the selected platform suitable for the specified log source product (or Sigma Product, Service, and Category).
Note: The default profile is automatically applied only for log source products that have Sigma Product, Service, and Category associated with them.
Configure the mapping. If you need to map only fields, do not fill in the Source or Values tab.
Source
The exact name of this tab depends on the selected platform since we use the native names of the log data locations for Microsoft Sentinel, Elastic Stack, and Splunk:
- Microsoft Sentinel: Table
- Elastic Stack and Splunk: Index
- Other platforms: Source
To configure the log source location, take the following steps:
- Click on the DEFAULT SOURCE field and type the default name of the location (index, table, etc.) where logs of the indicated product are stored. This is the name used in a standard data schema. When finished typing, click on the entered name to add it.
Note: For some platforms, the value of this field is predefined and cannot be changed. In predefined names, an asterisk (*) is used as a wildcard. - Click on the CUSTOM SOURCE field and type the custom name of the log location. This is the name used in your actual environment. When finished typing, click on the entered name to add it.

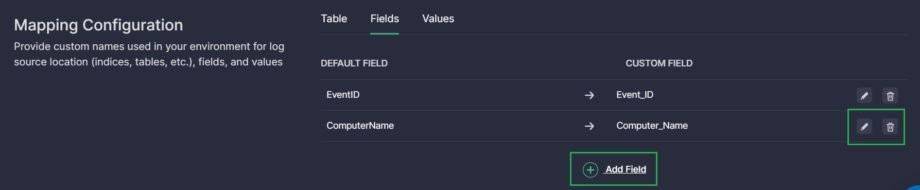
Fields
To customize the field names, do the following:
- Click on the DEFAULT FIELD and start typing the default field name used in a standard data schema. Select a suggested option or, if there’s no relevant option, finish typing and click on the entered name to add it.

- Click on the CUSTOM FIELD, type the custom field name used in your actual environment, and click on the entered name to add it.
- Click the green checkmark icon to save the field mapping.

- Add all required field mappings using the procedure above. Click Add Field to add a new field. If you need to edit an added mapping, click on the pencil icon near it. To delete a mapping, click on the trash icon near it.
Note: You can import field mappings using a CSV. The file should be comma-delimited and have two columns:
- First column with the default field names you want to change
- Second column with your custom field names
Field names can contain only characters, underscores (_), dashes (-), or dots (.). The maximum allowed number of lines is 500. Empty rows are ignored.
Values
To customize the field value, take the following steps:
- Type the name of the field for which you need to map values.
- Type the name of the original and new values.
- Click Add Value to map values for another field if needed.

Note:
- You can have the same new value for different original values of a field.
- If you map multiple new values to the same original value of a field, only the last mapping is considered.
- If you leave the original value empty, the entered new value is used for ANY original value of the field.
- To dynamically insert the original value as part of the new one, use {VALUE} placeholder in the NEW VALUE field.
- To modify any original value of a field according to a pattern, add {VALUE} placeholder that stands for the original value to NEW VALUE and leave ORIGINAL VALUE empty. For example, to add a prefix “Microsoft-Windows-Security-” to any value in the EventID field, make the following mapping:
- FIELD: EventID
- ORIGINAL VALUE: leave empty
- NEW VALUE: Microsoft-Windows-Security-{VALUE}
To save a created Custom Field Mapping profile, click Save Changes. 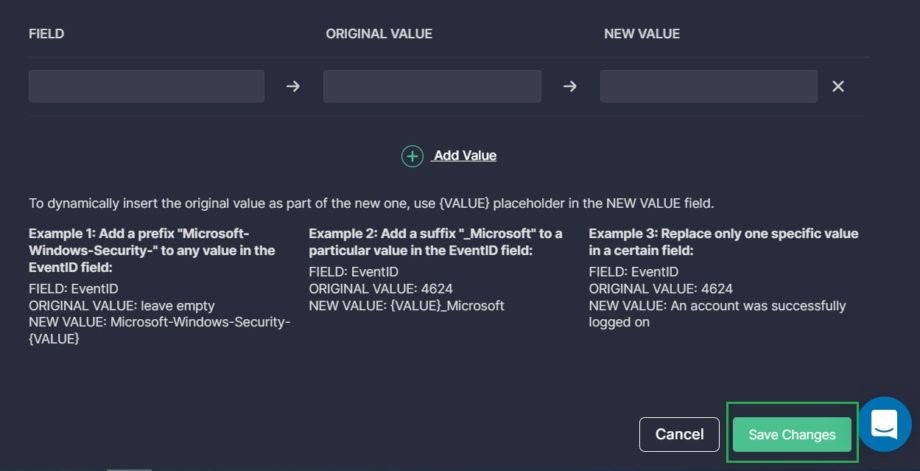
You’re all set and can instantly apply the created Custom Field Mapping profile for content deployment into your SIEM, EDR, or XDR solution.
Join SOC Prime’s Detection as Code platform to boost threat detection capability and accelerate threat hunting velocity leveraging an all-in-one solution designed for any cybersecurity team in the world. SOC Prime Platform harnesses the power of collaborative cyber defense connecting thousands of cybersecurity professionals from across the globe with a diverse skill set and technology expertise. Industry experts looking for ways to enrich the collective pool of knowledge can apply to the Threat Bounty Program, share their own detection algorithms with the cybersecurity community, and get rating-based financial rewards for their contributions.